

 Log In


August 22, 2025
 Offline

I picked up this Winchester 101 over and under, I’m looking for some guidance and understanding what is going on.
There are two problems only one of the ejectors is firing the lower.
The selector switch seems to have mind of it’s own plus its not firing in the correct order.
I think I’ve pinpointed the problem but need to understand why it’s happening.
So in the two videos below you will see the action open and the hammers move back, the one hammer always locks in place the second hammer which I’m thinking is why the selector is not working correctly and its firing barrels erratically does not lock back into place. As you can see when I move it back ever so slightly it does end up locking in place. Maybe its not supposed to do this. Someone with some experience on this platform could let me know.
The second issue the lower ejector is not operating. I’m guessing its due to this ejector rod being deformed but again could someone chime in here and let me know what I should be inspecting.

January 20, 2023
Offline
I am not a gunsmith amd only know of two near Dallas I would trust to touch my one remaining 101, a Pigeon Grade 28 gauge. I’ve owned and used a similar 12 gauge.
Your videos are not visible to me but, from what you’ve said, I assume you’ve already done some disassembly, if you can see the tumblers move back. I didn’t think you could observe such things by removing the forearm. Am I wrong? If so, you have already done more than I would risk doing.
My experience with both Models 101 has been the action – in particular the electors– do not like to be dry or dirty. With a gun so long out of manufacture, old dried lubricant can be a factor.
If the gun were mine, I would not attempt a diagnosis, much less undertake an amateur repair. Fine double guns have to be made and fitted to very close tolerances and it is not simple to even get one safely broken down sufficiently to diagnose the problem. An incorrect reassembly can cause permanent damage.
I would locate a gunsmith well known to be proficient at working on double guns and ask him to completely dissassemble the gun, clean it to bare metal, diagnose the fault, if any beyond dirty, re-lubricate, reassemble and prove it for good working order. That may take a good couple of hours shop.time and a couple of C notes. But you won’t have done anything regrettable.
If that is offensive, I mean it for the best. If you were a sufficiently experienced gunsmith capable of doing what I think should be done, you wouldn’t be asking for help. I came close to ruining a very collectible Winchester before taking the foregoing advice. It’s not hard.
Unless the gun has been really abused, I would bet a a donut it is dirt or dried lubricant.
- Bill
WACA # 65205; life member, NRA; member, TGCA; member, TSRA; amateur preservationist
"I have seen wicked men and fools, a great many of both, and I believe they both get paid in the end, but the fools first." -- David Balfour, narrator and protagonist of the novel, Kidnapped, by Robert Louis Stevenson.
August 22, 2025
Offline
For whatever reason posting the videos seems to be an issue on this group, here are links.
You can’t see the hammers by removing the forearm that is correct. There is very little info about these guns im able to find a book or service manual would be handy but I’m not sure if they make such a thing.
It’s not lubricant.
I’m in Canada gunsmiths are few and far between plus I don’t really trust anyone to do anything for me anymore… I work on exotic European cars that cost 100x what this shotgun does. It’s not that complicated. I will eventually figure it out. I just figured if someone watched the videos and works on these a lot they might be able to save me hours of diagnosis and trouble shooting. I’m fairly confident I know what the issues are but before I start to file parts that are deformed back to original profile, it would be nice to hear from someone else about it that is more qualified then me. I agree if you aren’t up to the task then by all means you should be going to a qualified repair center. I’m a more technical person that would like to learn how these work and be able to be self sufficient.
I appreciate your reply however, our Canadian major gun forum has not got any responses yet. So coming back here to see a response got me excited.
August 22, 2025
Offline
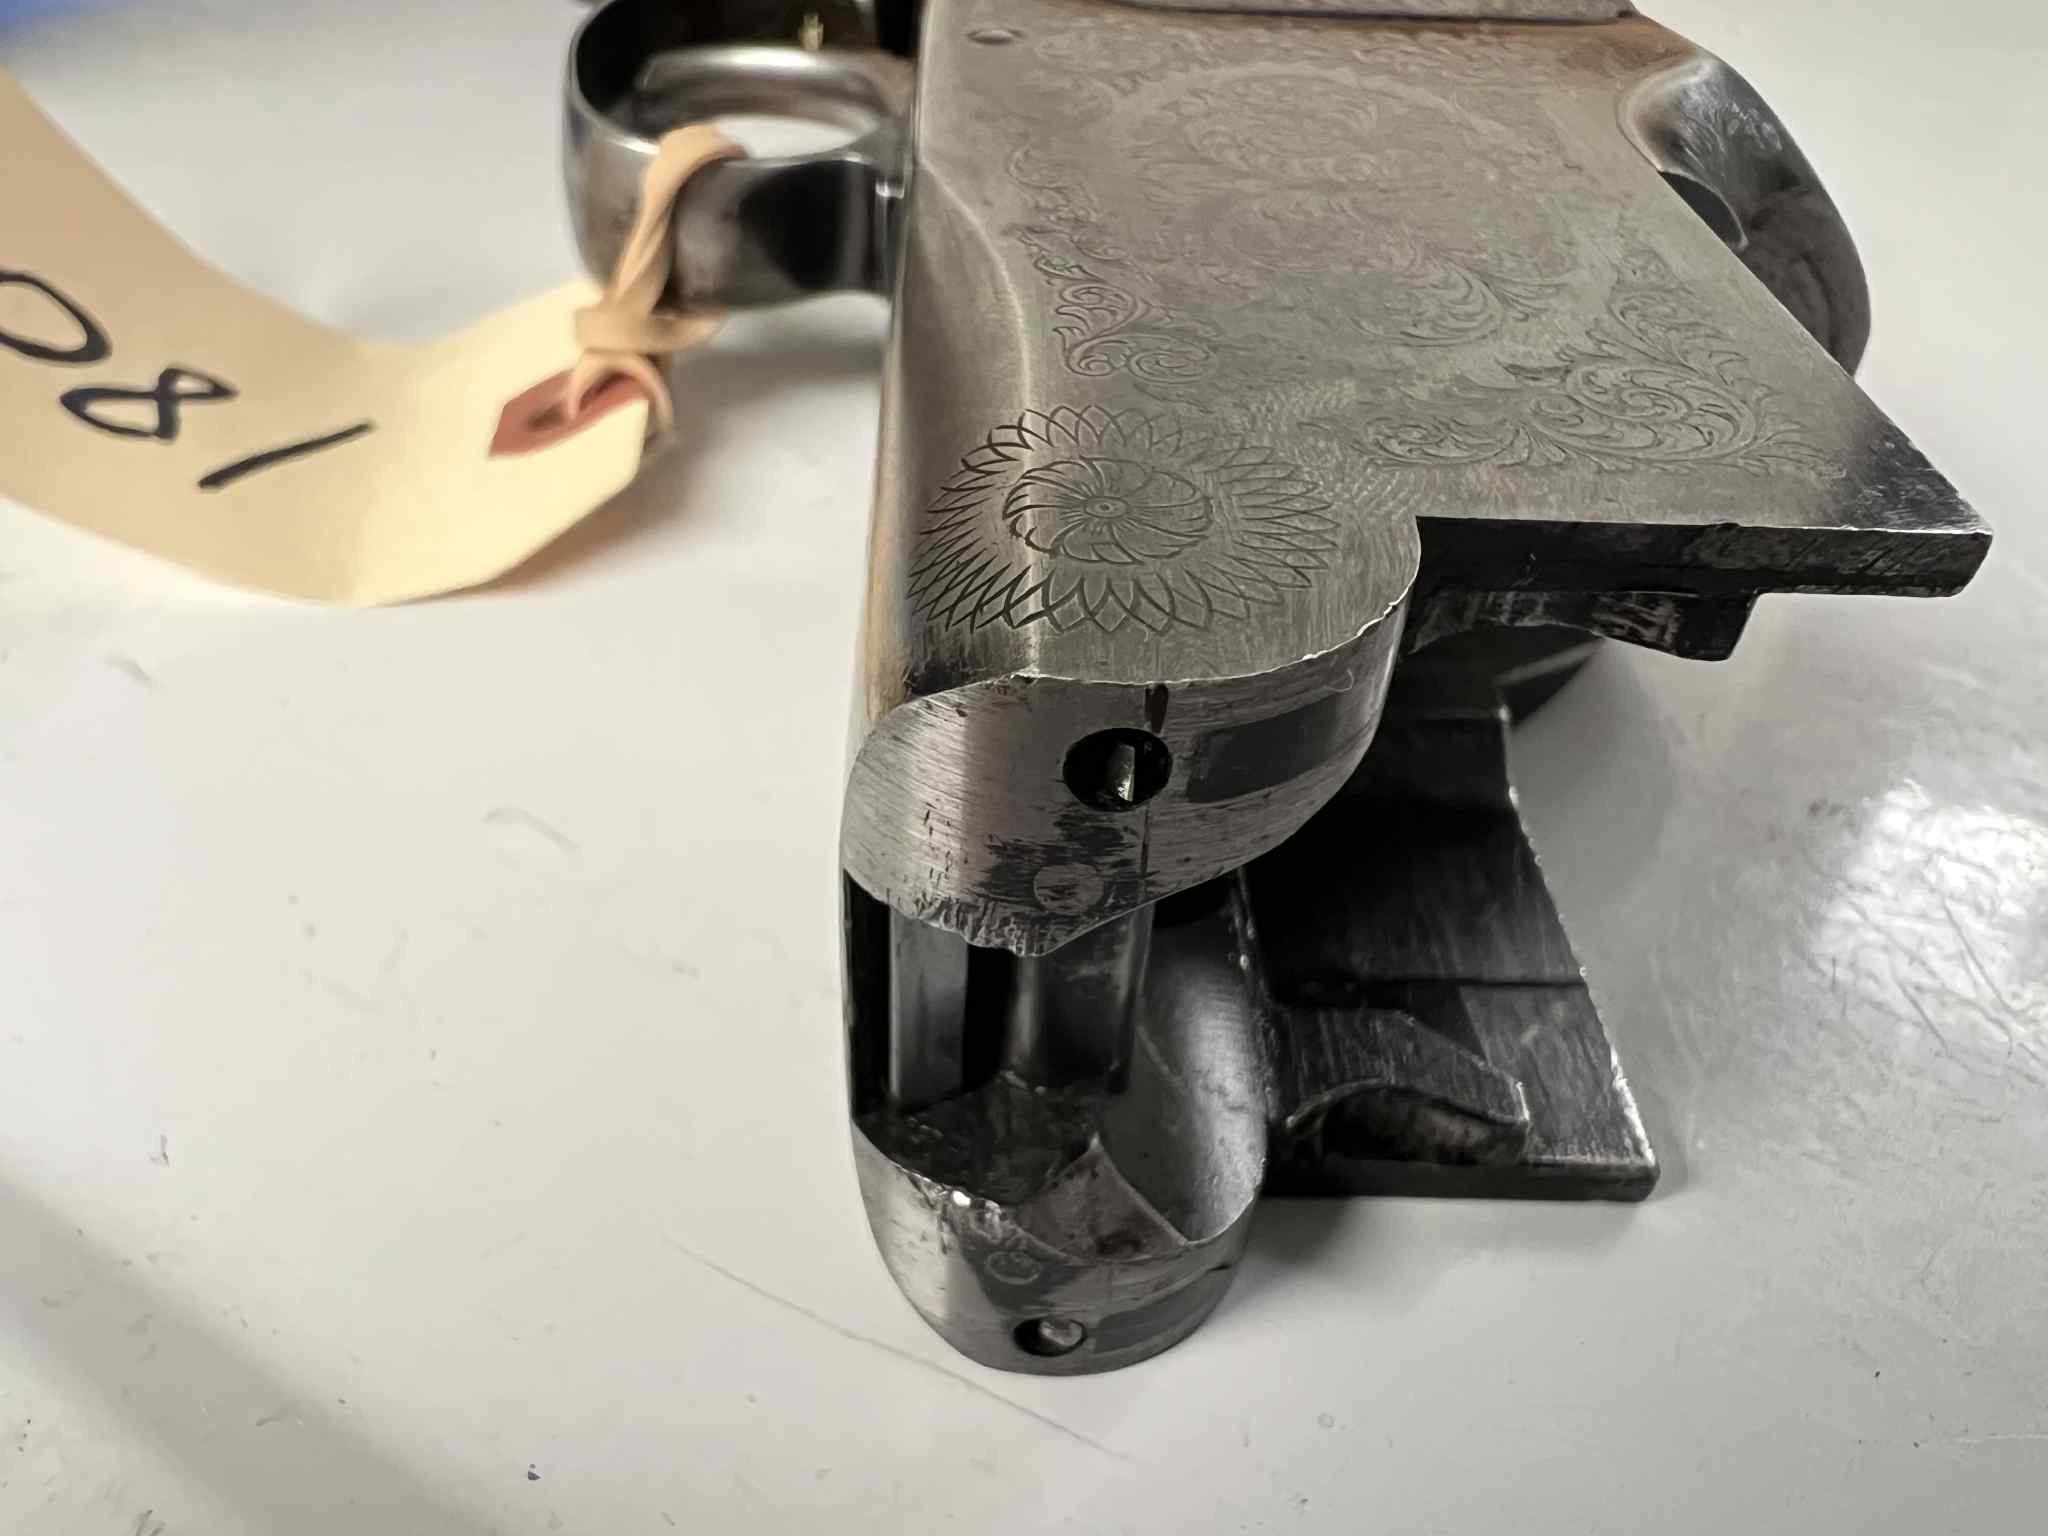
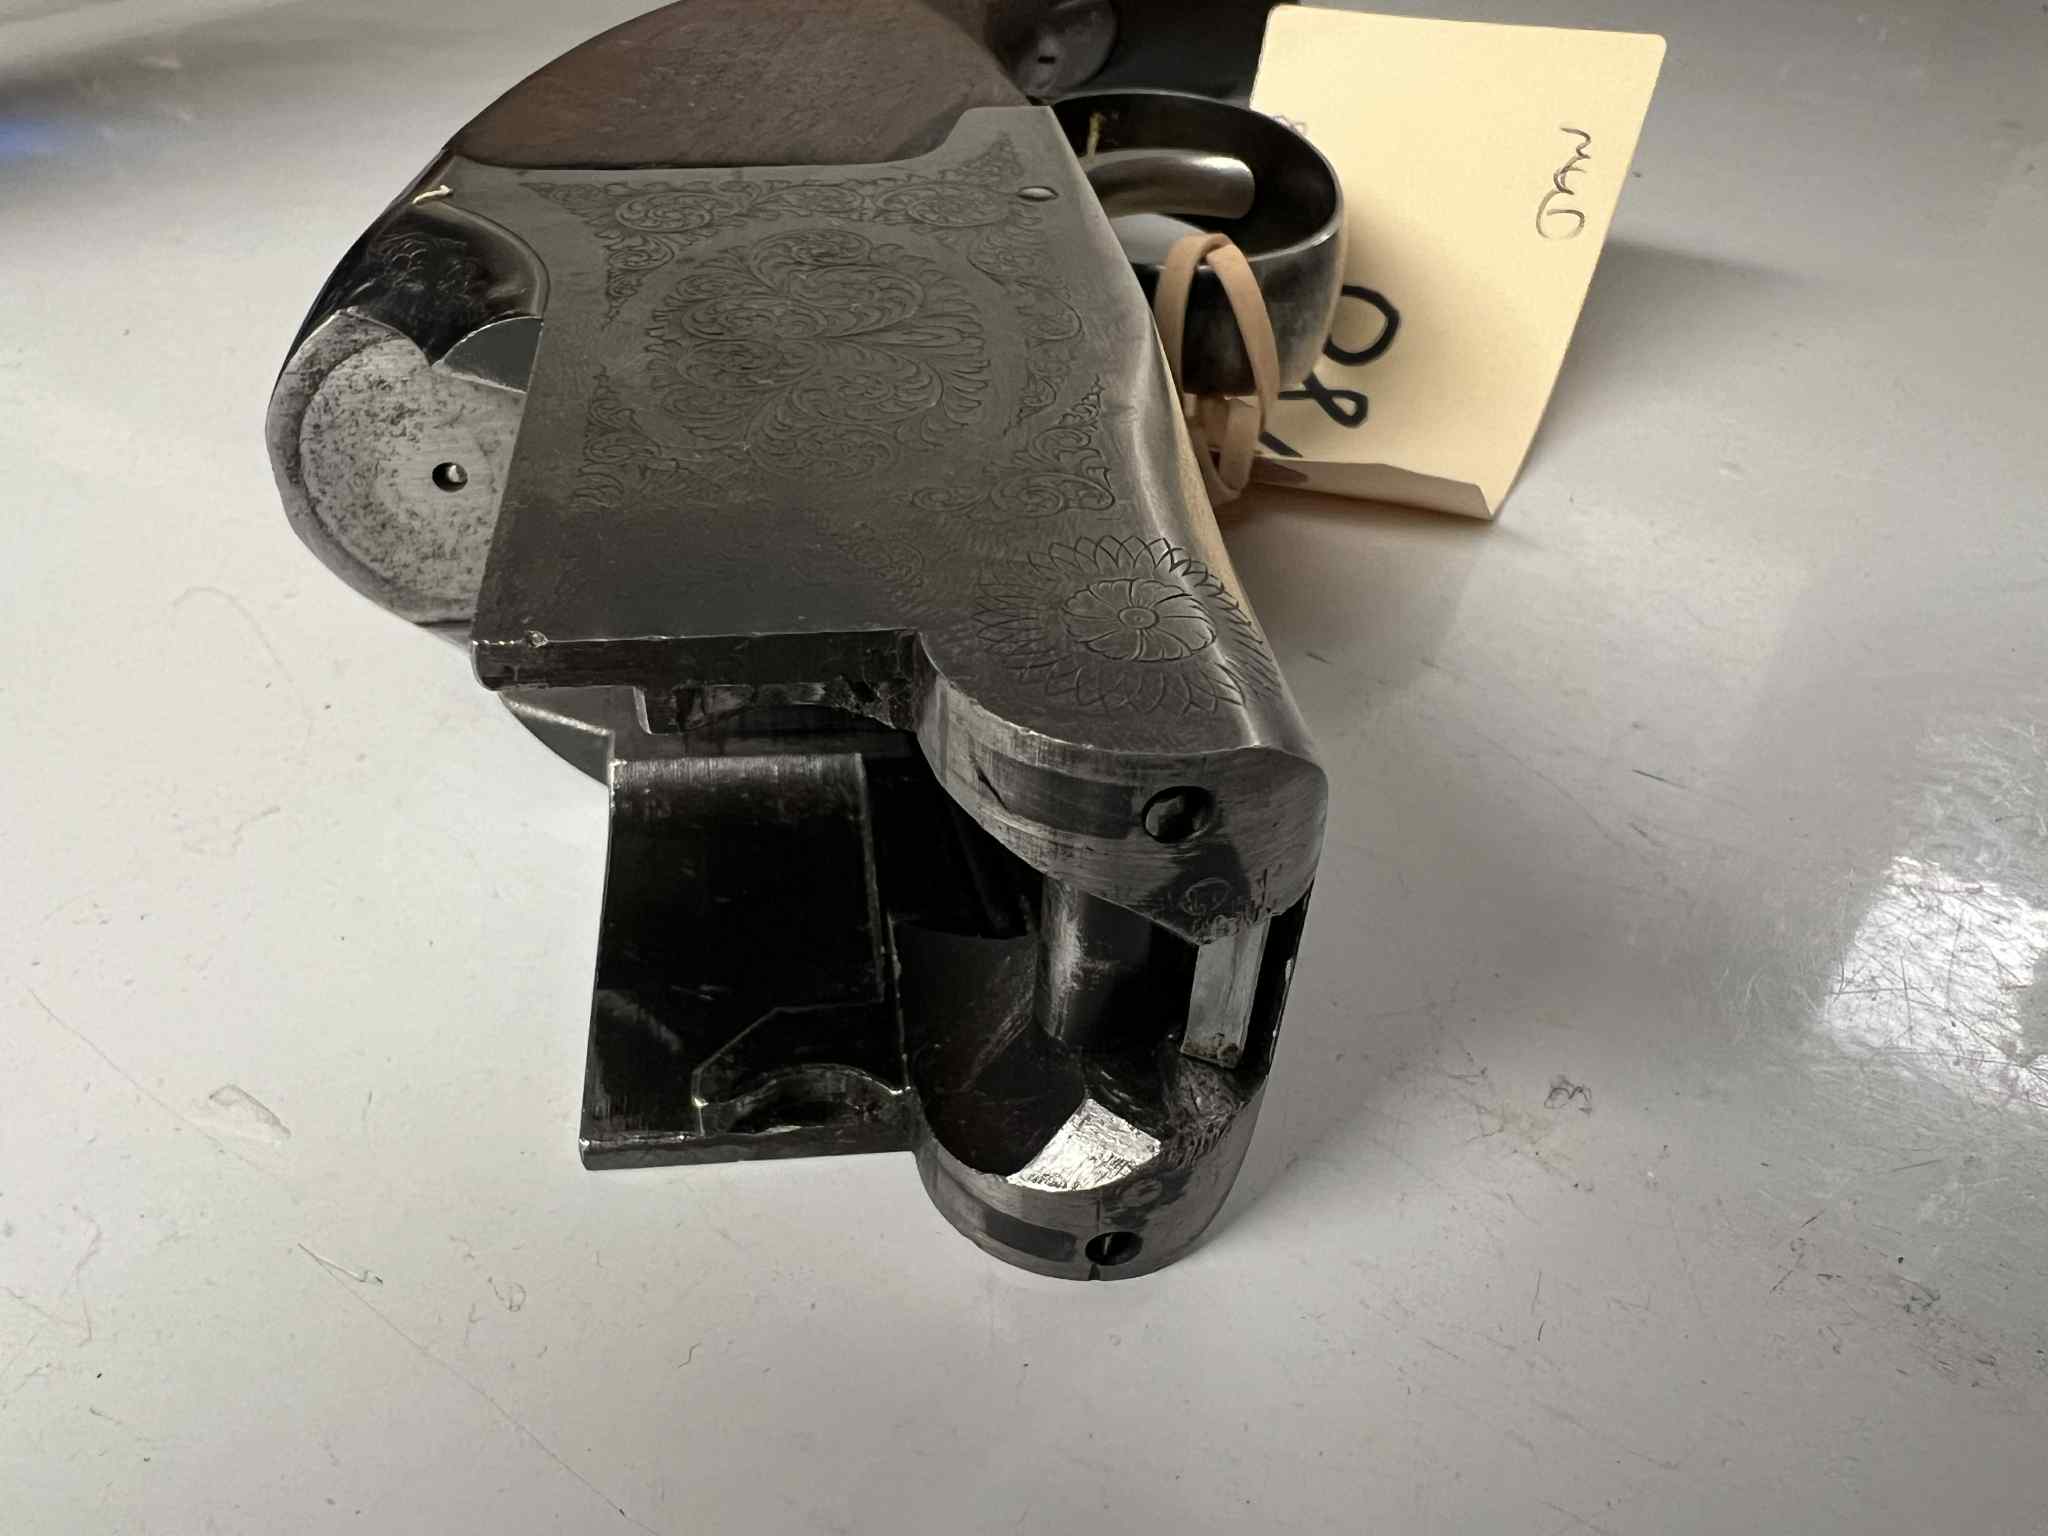
From my understanding these are the rods that fire the ejectors or manipulate the ejector sears. one comes to a nice chisel point which seems to match up with the replacement part. The other side is rounded and to me seems to be the issue with it potentially not working. I removed them cleaned them they move freely however. before replacing the deformed one I was going to try and attempt to file it to the same profile as the other side to see if that solved the problem before dropping money on some replacement parts.

September 19, 2014
Offline
Perhaps all I will do is muddy the waters here, but the cocking rods engage hooks in the fore end iron assembly. The rods have to be a correct length plus the hooks have to be properly spring loaded and also not damaged. All working together then sets the hammers back enough to engage with the sear notches. For whatever reason the hammer for the bottom barrel is not being pushed back quite enough to engage the sear notch. Look first into the fore end iron and verify if the springs are good and the hooks are good. Obviously the hammer for the top barrel is functioning properly so compare the right side (for bottom barrel) with the left side (top barrel). Filing on the rod is only going to shorten it! That is a problem. Tim
September 19, 2014
Offline
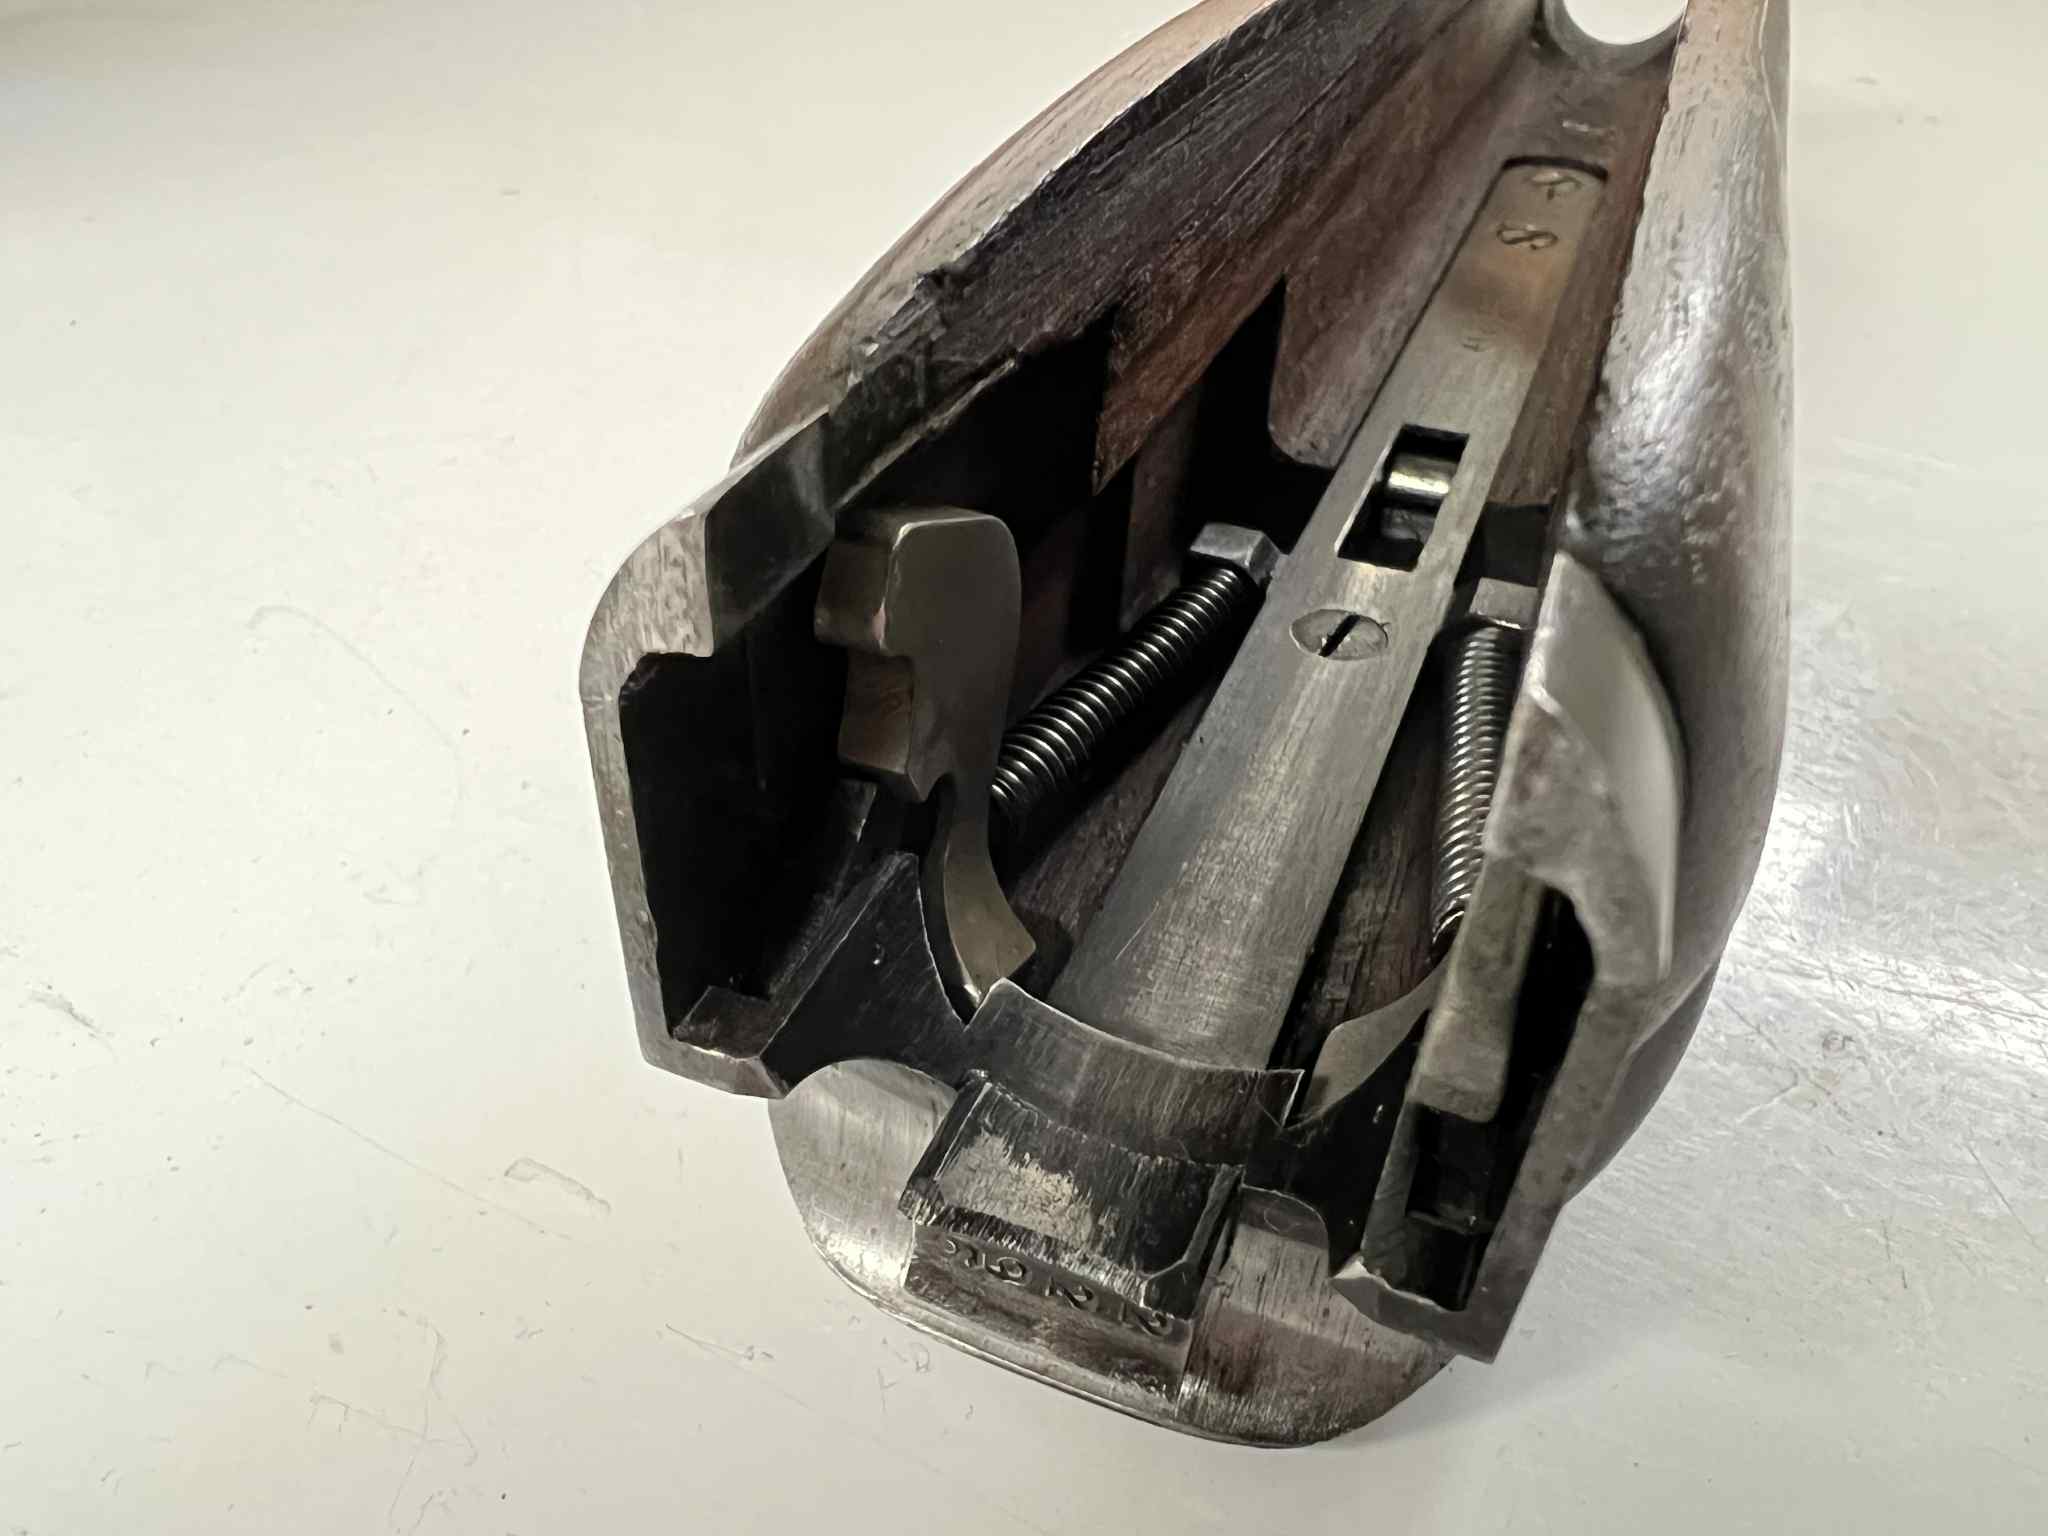
All right! Totally messed up my missive! The cocking rods are still likely the problem but I’ve confused the cocking rods and the ejector rods, both in my mind and in my message. Cocking rods are in the middle at the bottom. Still verify the surface they work against in the fore end iron is not damaged and the two cocking rods (or potentially just the one wider rod) have a good surface to work against. Then if good, I would remove the hammers and verify the right one is not worn or the cocking rod is not worn where it works on the bottom, front of the hammer to set it back. I still would not file on the rod attached to the side of the hammer as that trips the ejector in the fore end iron and the springs then pop out the empty. The cocking rod is working on the short arm of the lever that is the hammer so a very small dimensional difference makes a bigger difference for the top of the hammer to move into setting into the sear notch. Wear in the fore end iron can do that is likely more the source. You may note a smear looking surface where the fore end iron works against the cocking rods. If smeared enough from lack of proper lube in the past–odds are you may need to replace the iron. Sorry for the confusion but it is becoming more common with my memory. Tim PS. by any chance is the fore end iron not set back properly by the stud on the bottom barrel? I no longer have any 101’s to open and look at.
August 22, 2025
Offline

I’ve replaced those ejector hammers as they both where cracked, I’m not sure if they are jamming like that or not being reset correctly because of the deformed ejector selector rods.
September 19, 2014
Offline
Andrew, if I may call you that. No surprise on the ejector hammers being cracked. They take a lot of jarring over time, and they have some finite service life. Don’t think they would have any impact on the main action hammer not fully cocking. The photo you show of the fore end iron shows me the mating surface that should be what causes the cocking rod to cock both hammers and it looks OK to me. Overall I do see signs though that the gun has not been adequately lubed over its life. Striations in the fore end iron where it meets the main action body plus earlier photos of the front of the action which also has plenty of drag marks from no lube, but there again, that should not preclude cocking of the bottom barrel/right hand hammer. I do see a bright line at the very bottom of the fore end iron which should be almost a knife edge and fit into the recess in the bottom of the action. If it is curled up any it may preclude the last tiny bit of rotation of the fore end and fore end iron to cock the hammer. By the way, do not get any part of your anatomy between those pieces when opening your shotgun! The divot in the action body is there for a reason and it WILL remove meat! I am fearing my advice/directions are too limited to really help you, however. Biggest issue to this point in my mind is the inability to cock that right hand hammer. If that is resolved, then use carburetor cleaner to clean and dry the inertia block to try to ensure it swings under recoil to reset the trigger to the other barrel. There are very fine hair springs that need to be present and in the correct locations for that all to work. HOPE NO ONE HAS HAD THAT OUT before you! From what I see, you may be getting in on a shotgun that had been worked on previously and you now do not have a known base to begin with. I am reminded of the old joke sign in mechanic’s areas of the differing costs to repair the car, with “if previously worked on by owner its $500 per hour” or something like that. Keep Bill’s advice at hand. GOOD shotgun smiths are a rare breed but they got their knowledge the hard way. I’ve no ideas about Canada and do appreciate your difficulty. Tim
August 22, 2025
Offline
It was an auction purchase so there is no history. Do you know to take out the part that slides from that forend to the hammers. requires pounding out that intricately engraved pin going thru the action. I want to inspect it better as all it would take is 1mm of build up on it to prevent that other hammer from locking back. Is this an inertial reset trigger because, it seems when breaking the gun open it sets the triggers. at least one of them. we did test fire it and both barrels fire but id say about 50% the top fires when selecting the bottom as that hammer is not engaging the sear on it’s own.
September 19, 2014
Offline
Andrew, I am rapidly running out of my comfort zone here. Please take what I write with a large grain of common sense on your part. First, the guns I shoot for the most part have mechanical reset triggers, so no real experience with recoil reset (inertia reset) triggers. I would never attempt removing the action bar that recocks the hammers, but you can remove the hammer (or hammers) and see that end of the bar and where it contacts the hammers. I seriously doubt it possible to mar the faces of the action bar as no doubt it is tempered tool steel or even harder. The hammers have to be case hardened I think to avoid wear yet not crack or break like the ejector hammers. But I’ve heard of hammers breaking in some over/unders. Let’s try an easy fix first. Hose the insides of the action out with carb cleaner or brake cleaner, and blow out with compressed air. See if that helps before removing anything further. IF you oil the action do so sparingly. Try to ensure your fore end and barrels get a full arc of movement so the action bar is fully pushed to the rear (I think it likely is but check as best you can). Ensure there is no grit,crud, old crap keeping the sear from moving forward to catch the hammer hook. When you moved the hammer by hand it did seem to be fully engaged, but check the sear please. IF the inertia trigger assembly is at fault I can’t help you at all. Best I can say to check its function after the carb cleaner/brake cleaner treatment is to cock both hammers, watch as you take the safety off, then trigger the one hammer and see how it functions. Then if all is normal, tap the back of the action with a brass or nylon hammer and see if the inertia trigger resets to the other barrel. You and I are too far apart for real help I fear. I am liking Bill’s advice more and more! Tim
August 22, 2025
Offline
lol due to our government we no long have the good brake cleaner… its just aerosolized acetone now… better for the environment LOL Works like shit!
Generally speaking the area behind that is covered by the stock wouldn’t have much if any buildup as you see in the pictures. The area that will have gunk built up is the area of the break action that is exposed to the gunpowder etc I’m gonna have a look to see that everything is clean in there because a small amount of buildup might be enough to cause this trigger problem. I’m also going to try and reshape the end of that ejector selector rod to see if there is any improvement before buying a new one.
I can ultrasonic clean it if necessary.


1 Guest(s)
